
Last week I was able to host a baby shower for Tess and her new baby Emilie! It turned out to be a lot of fun, and the food was great (thanks to the Burrs, Whitney and Dani).
I was in charge of doing a few decorations and wanted to do some things that Tess could have for Em's room.
I found
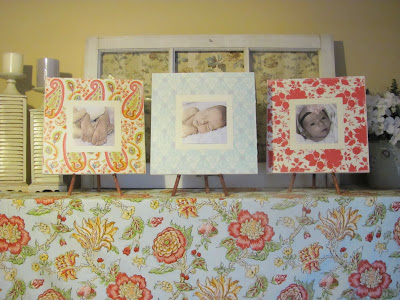
this idea a long time ago and had wanted to try to make these picture boards. Now was the perfect chance! I hit up Home Depot and lucked out finding a large piece of MDF board in the clearance bin for $5. I then (with the help of my husband) found a kind employee of Home Depot to cut it into 12 x 12 inch boards (for free might I add!). Thanks Home Depot!
I did a few coats of cream paint on the boards........let dry overnight.......then found some cute coordinating 12 x 12 scrapbook paper. I trimmed the paper just a tad so that a bit of the cream colour was showing and so it was easier to apply the paper.
I put a layer of Mod Podge on the painted (and sanded) board......then placed the paper on......then another layer of Mod Podge ontop of the paper. I must confess that I find Mod Podge tricky at times and find it hard to make things perfectly smooth, so if anyone has any tricks, please share! So smooth out the best you can with your fingers, and then let dry. I then Mod Podged a 5 1/2 x 5 1/2 piece of cardstock onto the center of the board. This is the matte for the pic, so do it as much wider than the pic as you desire. I did the pics 5 x 5.
Tess, Whitney and I took some pictures of Emilie and so we used those for the center. I just applied those with some scrapbook adhesive squares. I thought they turned out really cute and will be a good addition to Emilie's room!
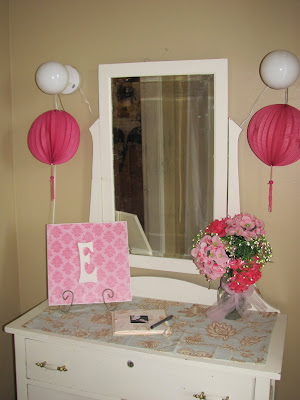
On the fourth board I did an "E" instead of a pic. The sky is the limit with the things you could do with a piece of MDF.

My mother-in-law said you can get 12 x 12 pieces of MDF precut at Windsor Plywood, so that's a little tip for you if you don't feel like doing the whole Home Depot thing.

I didn't get a close up of these, but you can see them off to the sides here. I saw some flower balls at Michaels and thought they were really cute but didn't want to pay the $7 for one! So I bought some various sizes of styrofoam balls at Michaels (they were on sale even!) and at the Dollar Store. I then cut up tissue paper in the colours I wanted (about 2 inch by 1 inch strips), coated the styrofoam ball in sections in Mod Podge (yes, I love this stuff) and then crinkled and applied the tissue paper. After the ball was completely covered with tissue paper, I poked a clear push pin into the top of the ball, to which I tied a piece of ribbon to hang it. My original idea was to make a whole bunch of these and hang them from a wreath to give the look of a baby mobile, but time ran out and I just ended up hanging what I had from the roof. They are a bit time consuming, but cost effective and can be used over and over!


