As you take the normal opportunities of your daily life and
create something of beauty and helpfulness, you improve not
only the world around you but also the world within you.
~President Dieter F. Uchtdorf

Wednesday, September 15, 2010

Another Cheapy Easy Recipe

I tried this recipe this past weekend and thought it was a great variation to our usual plain ol' taco recipe. It's quick and very tasty!
This is a recipe from my friend Debbie.

Cheesy Nacho Beef Dinner
1 pkg Rice-A-Roni (I used the Spanish one)
1/2 lb. ground beef
2 cups water
1 cup salsa
1 can corn
1 cup (or can) black or brown beans
1 tomato, chopped
Shredded cheese
Sour Cream
Tortillas or nacho chips

Saute rice with beef in large skillet over medium heat until beef is browned. Stir in water, salsa, corn, beans and seasonings. Bring to a boil. Reduce heat to low. Cover and simmer 15-20 minutes until rice is tender. Stir in chopped tomatoes. Wrap in warm tortilla with cheese and sour cream (or on chips).

Tuesday, August 31, 2010

Style Me Pretty

I came across this great site. We are in full wedding mode right now and this place has some great ideas!
http://www.stylemepretty.com/

Thursday, August 26, 2010

Whitefield Design by Brynn Snyder

I have been meaning to spread the word about one of my talented friends. Brynn (MacLennan) Snyder and I have been friends for....well, our whole lives, I guess. She has recently started her own design company and it is definitely worth checking out. She graduated in Industrial Design with a Bachelor of Fine Arts from Brigham Young University and is one creative girl. So far I have been the lucky recipient of some beautiful thank-you cards, and a personalized monogram address stamp. She does great work. Check it out!
http://www.whitefielddesign.com/index2.php#/home/
or
http://www.whitefieldprints.blogspot.com/

Friday, August 13, 2010

Take A Look -- White Berry Reinvented

I just discovered this talented lady's site. She is in the Edmonton area, which makes it even better!
http://www.whiteberryreinvented.com/index.htm

Tuesday, August 10, 2010

Wedding Bells

Our sister is going to be getting married in about 8 weeks, which will make her wedding a Thanksgiving/Fall one.

Weddings are one of the best times for creativity to shine through. Trying to get big impact for the least price takes some real talent.

With this in mind, we would love to see what you, or someone you helped, did for a wedding. Send in your pictures of anything wedding related to creatingdaily@gmail.com. Don't be shy, it will be fun to share some ideas! Also don't worry about what season your wedding was, just send em' in.

Here are a few to start from my own......so long ago, haha.....

The dress---I have always been interested in designing dresses, and so I was able to design my dress, find and put together the fabric, and with the help of my amazing seamstress, create just what I had hoped for. I love lace!


The bouquet. I love hydrangeas, and being summer I was able to have fresh ones! I pinned my grandma's broach onto the bouquet for an extra personal touch!


The cake was made by my talented cousin. I am a chocolate lover, so this was a fun treat!


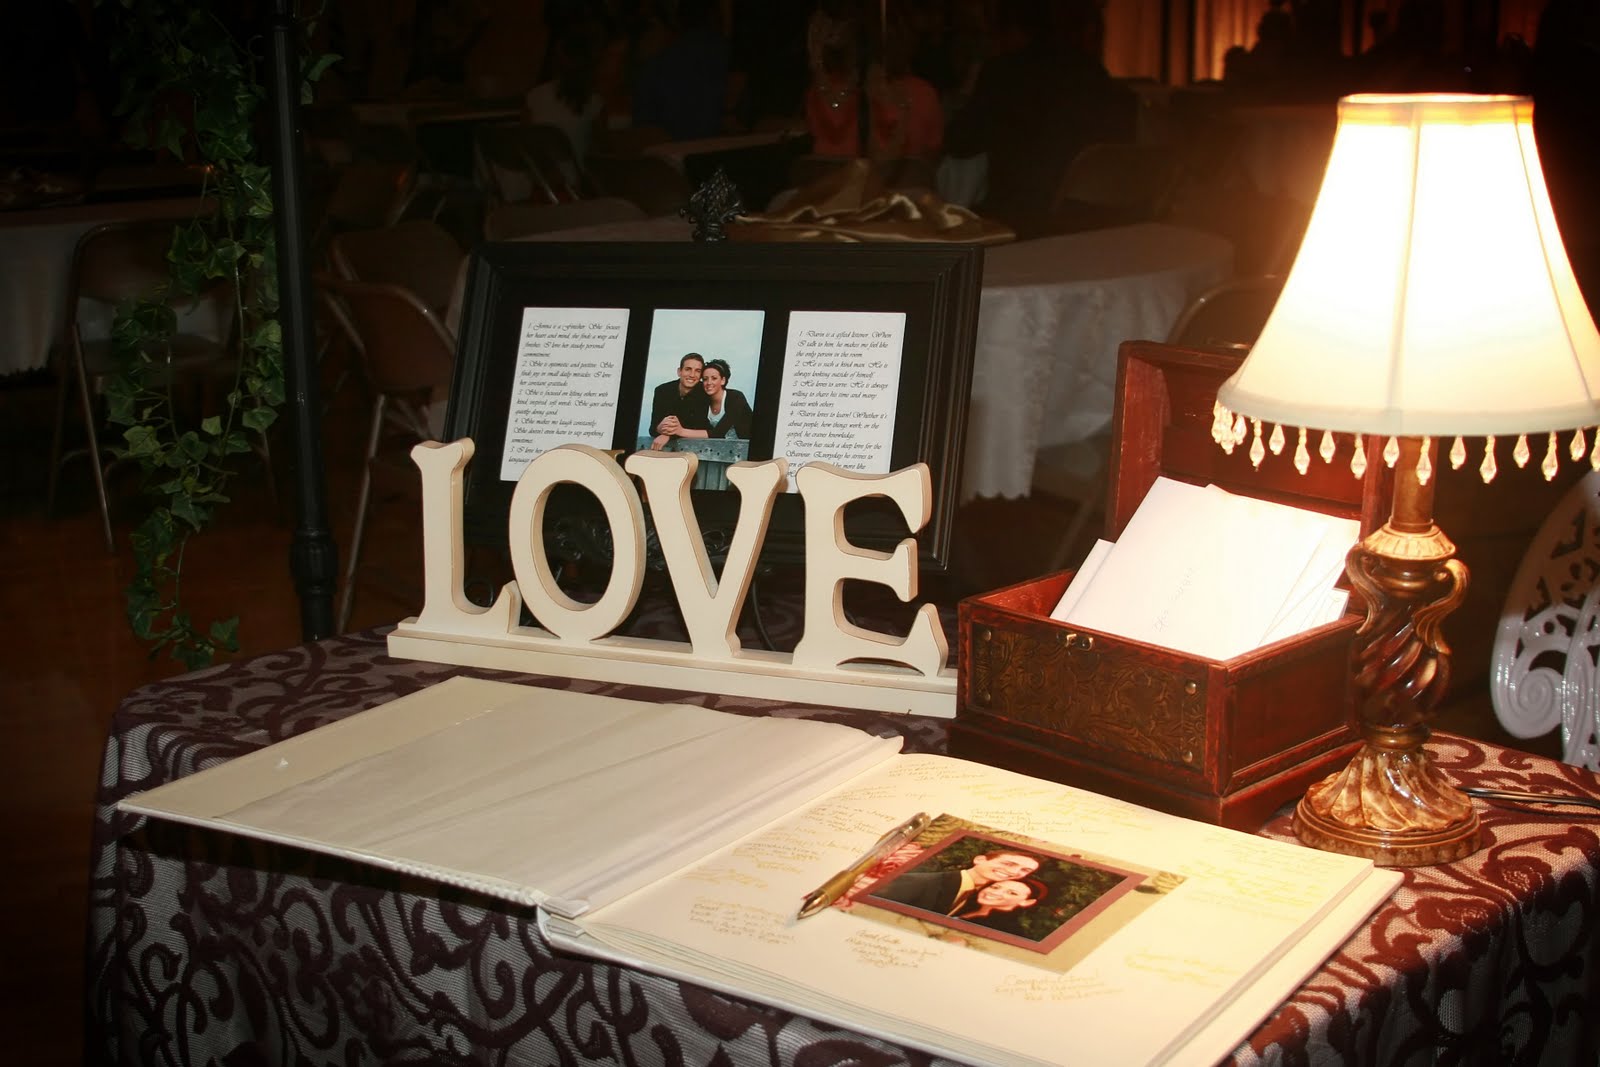
The guest book I made using fabric paper and pictures my father-in-law took of us. We also had at the guest book table a picture frame with "10 things Darin loves about Jenna, and 10 things Jenna loves about Darin." This has been fun to have hanging in our room and to read over.....some things just don't change!


My mom had aprons made for us. "Darin loves Jenna" and "Jenna loves Darin" printed on them. We still love wearing them!


The centerpieces were welded iron twisted rods with a 4-legged base. My father-in-law and brother-in-law were the creators of these. My mom and I did the hydrangea flower arrangements.


The backdrop was a creation from my sister-in-laws family. We just added our own flowers.
Posted by Picasa


And a few ideas from others......


Tuesday, July 20, 2010

Easy Yummy Rotini Bake

This recipe has been a good one to substitute for making Lasagna. It's easy and kids seem to really like it!
Enjoy!


Rotini Bake

12 oz. uncooked curly rotini or small tube pasta
1 lb ground beef
1 jar( 26 oz.) spaghetti sauce
2 eggs slightly beaten
1 carton cottage cheese (16 oz.)
2 cups grated mozzarella cheese (divided)
1/2 cup grated Parmesan cheese

Preheat oven to 350 degrees.

Cook noodles according to package directions and drain.

In frying pan, brown and drain beef while noodles are cooking. Stir spaghetti sauce into beef.

In a large bowl, combine eggs, cottage cheese, 1 cup mozzarella, and parmesan cheese. Gently fold cooked pasta into cheese mixture. Spread third of the beef mix over bottom of a greased 9X13 pan. Place half the pasta mix over beef. Layer another third of the beef over noodles. Layer remaining noodles over top, followed by remaining beef mix. Cover and boake for 40 minutes. Uncover and sprinkle remaining cheese over top. Return to oven and bake for 5-10 min more, or until cheese is melted. Makes 6-8 servings.

Tess's Baby Shower


Last week I was able to host a baby shower for Tess and her new baby Emilie! It turned out to be a lot of fun, and the food was great (thanks to the Burrs, Whitney and Dani).
I was in charge of doing a few decorations and wanted to do some things that Tess could have for Em's room.
I found this idea a long time ago and had wanted to try to make these picture boards. Now was the perfect chance! I hit up Home Depot and lucked out finding a large piece of MDF board in the clearance bin for $5. I then (with the help of my husband) found a kind employee of Home Depot to cut it into 12 x 12 inch boards (for free might I add!). Thanks Home Depot!
I did a few coats of cream paint on the boards........let dry overnight.......then found some cute coordinating 12 x 12 scrapbook paper. I trimmed the paper just a tad so that a bit of the cream colour was showing and so it was easier to apply the paper.
I put a layer of Mod Podge on the painted (and sanded) board......then placed the paper on......then another layer of Mod Podge ontop of the paper. I must confess that I find Mod Podge tricky at times and find it hard to make things perfectly smooth, so if anyone has any tricks, please share! So smooth out the best you can with your fingers, and then let dry. I then Mod Podged a 5 1/2 x 5 1/2 piece of cardstock onto the center of the board. This is the matte for the pic, so do it as much wider than the pic as you desire. I did the pics 5 x 5.
Tess, Whitney and I took some pictures of Emilie and so we used those for the center. I just applied those with some scrapbook adhesive squares. I thought they turned out really cute and will be a good addition to Emilie's room!
On the fourth board I did an "E" instead of a pic. The sky is the limit with the things you could do with a piece of MDF.

My mother-in-law said you can get 12 x 12 pieces of MDF precut at Windsor Plywood, so that's a little tip for you if you don't feel like doing the whole Home Depot thing.


I didn't get a close up of these, but you can see them off to the sides here. I saw some flower balls at Michaels and thought they were really cute but didn't want to pay the $7 for one! So I bought some various sizes of styrofoam balls at Michaels (they were on sale even!) and at the Dollar Store. I then cut up tissue paper in the colours I wanted (about 2 inch by 1 inch strips), coated the styrofoam ball in sections in Mod Podge (yes, I love this stuff) and then crinkled and applied the tissue paper. After the ball was completely covered with tissue paper, I poked a clear push pin into the top of the ball, to which I tied a piece of ribbon to hang it. My original idea was to make a whole bunch of these and hang them from a wreath to give the look of a baby mobile, but time ran out and I just ended up hanging what I had from the roof. They are a bit time consuming, but cost effective and can be used over and over!